
- A+
Introduction
The Epson wf7610 is a high-end printer that is commonly used by small to medium-sized businesses. As with any other printer or electronic device, it requires regular maintenance to keep it functioning correctly. One of the essential maintenance steps for the Epson wf7610 to work correctly is clearing the maintenance tank or ink pads located in the machine's internal maintenance compartment. This process is commonly referred to as maintenance tank or ink pad replacement.
Why should you clear the maintenance tank?
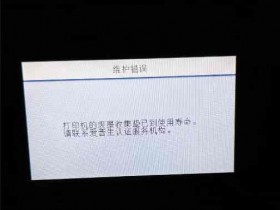
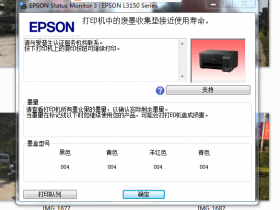
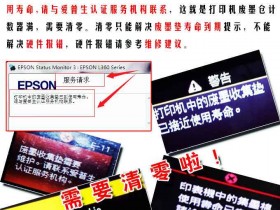
The Epson wf7610 makes use of an internal maintenance compartment that collects spilled ink from the printing process. Over time, this maintenance compartment fills up, and if it is not cleared, the printer's performance may be affected. The maintenance tank comes with a maximum capacity, and when it reaches it, the printer will stop working. Clearing the maintenance tank enables the printer to work smoothly and prevents ink leakage, which can affect printer performance.
When should you clear the maintenance tank?
The time it takes for the maintenance tank to fill up varies depending on how frequently you use the printer, the number of pages you print, and the ink cartridges you use. You should regularly check the Epson wf7610's maintenance tank to ensure that it is not too full. When the maintenance tank is full, you will notice warning messages on the printer's LCD screen, and the printer may stop printing.
How to clear the maintenance tank
To clear the maintenance tank, you need to replace it with a new one. Follow these steps to clear the maintenance tank of your Epson wf7610 printer:
Step 1: Turn off the printer and unplug it from the power source.
Step 2: Open the maintenance compartment cover on the printer's right side, using the release latch on its front.
Step 3: Carefully remove the old maintenance tank from its holder by gently pulling the tab on the top of the tank.
Step 4: Dispose of the old maintenance tank in compliance with your local laws and regulations regarding electronic waste disposal.
Step 5: Unpack the new maintenance tank and remove its protective film and seal.
Step 6: Insert the new maintenance tank into its holder by inserting it onto the guide rails and gently pushing it down until you hear a click sound.
Step 7: Close the maintenance compartment cover and turn on the printer. Check that the warning message is no longer on the printer's LCD screen.
Conclusion
Clearing the maintenance tank of your Epson wf7610 printer is an essential process that should be done regularly to ensure the printer operates smoothly. By following the steps outlined above, you can ensure that your printer works correctly and efficiently so that your business can carry out its operations seamlessly. Keep in mind that replacing the maintenance tank is just one aspect of maintaining your printer, and you should also follow other maintenance procedures like cleaning the print heads and changing the ink cartridges. When these processes are followed correctly, you can extend the lifespan of your Epson wf7610 printer and reduce the likelihood of breakdowns and technical issues.