
- A+
Introduction
Printers have become an essential device that every individual and office needs nowadays. Though printers are convenient, they can prove to be a bit expensive. The running cost of printers comes in the form of ink or toner replacements. In this article, we will be discussing how to reset the ink waste counter in Epson printers, which will help reduce your ink expenses.
What is an Ink Waste Counter?
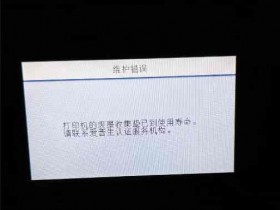
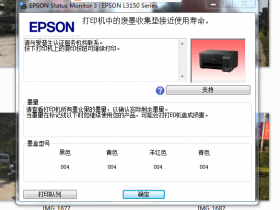
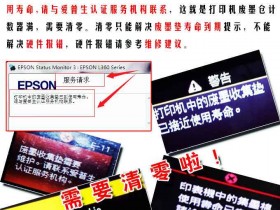
An ink waste counter is a feature built into Epson printers that monitors the ink waste pad's capacity. The ink waste pad is a sponge that collects excess ink during the printing process. Over time, the ink waste pad will become full, and the printer will indicate that it needs to be replaced.
Why Reset the Ink Waste Counter?
When your printer indicates that the ink waste pad is full, it means that you need to replace it. However, replacing the ink waste pad can be costly and time-consuming. Therefore, resetting the ink waste counter is beneficial for those who want to save money and time. By doing so, you can continue using your printer without having to replace the ink waste pad just yet.
Steps to Reset the Ink Waste Counter in Epson Printers
Here are the steps to reset the ink waste counter in Epson printers:
Press and hold the "Resume" button on your Epson printer for five seconds.
Release the "Resume" button while still holding the "Power" button.
Continue holding the "Power" button for another 10 seconds.
Release the "Power" button and wait for the printer to turn off.
Turn on the printer again, and the ink waste counter should now be reset.
Conclusion
Resetting the ink waste counter in Epson printers is an excellent way to reduce ink expenses. Instead of replacing the ink waste pad, you can reset the counter and continue using your printer. The steps mentioned above are straightforward and easy to follow. By doing so, you can save money and time while still enjoying the convenience of your Epson printer.